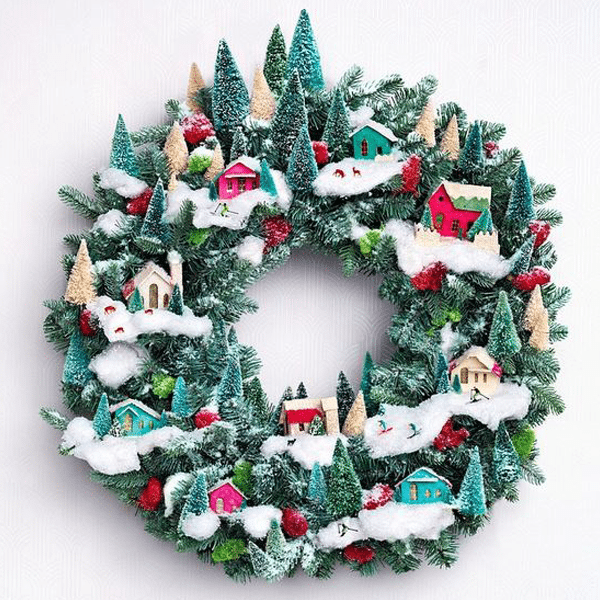
Wreaths are such a great way to decorate for the holidays! I especially love this Magical-Village wreath – it is so easy to customize for your own style of holiday decorating. It’s also fairly inexpensive as many of the items required can be found at your local dollar store!
Here’s how to create your own Village Wreath:
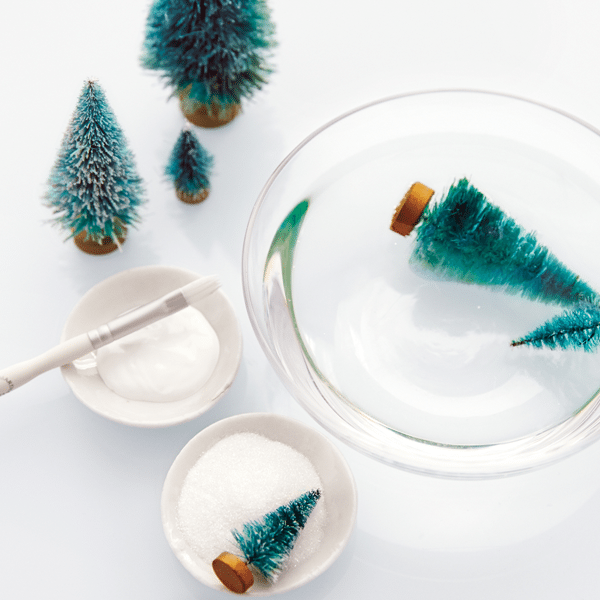
Glitter the Trees

Tips: We soaked some trees in a bleach solution, creating a mix of greens closer to what you would find in nature. The bleach doesn’t just lighten the trees; it gives them a lovely blue-green cast. Inexpensive hairspray can seal a glittered item: Spray it lightly over the trees and it will help the glitter stay on longer.
Materials:
- Green and white bottlebrush trees, 1 to 6 inches each
- Bleach solution (1 part bleach to 3 parts water, in a glass bowl large enough to submerge trees)
- Craft glue
- White craft paint and paintbrush
- Crystal and silver glitters
Directions:
- Soak some green trees in bleach solution until desired shade is reached, 5 to 30 seconds. Rinse well and let dry.
- Mix equal parts craft glue and white craft paint. Mix a little silver glitter into crystal glitter.
- Brush glue mixture onto tips of white and green trees. Sprinkle with mixed glitter, shake off excess, and let dry.
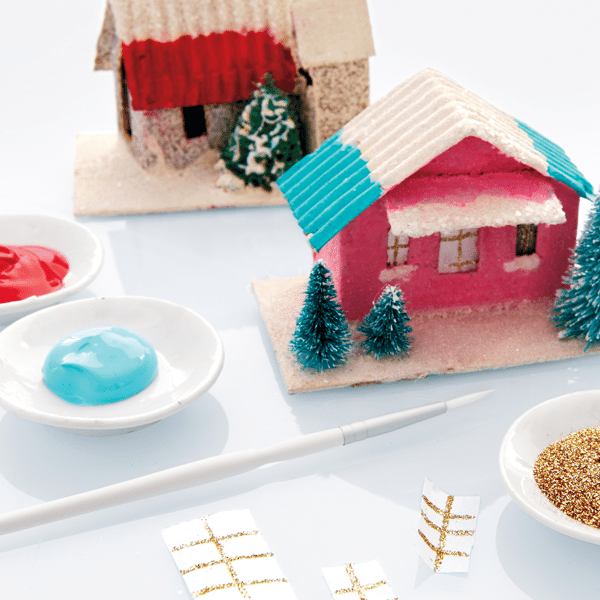
‘Renovate’ the Houses

Tips: Putz houses were popular through much of the 20th century and remain easy to find today — though they often need a little fixing up. Look for them online and from dealers who specialize in holidaycollectibles. You can also find new versions or even make your own (get Martha’s templates and how-tos).
Materials:
- Vintage putz houses
- Tweezers
- Parchment paper
- Glue pen
- Gold and crystal glitters
- Craft glue
- Satin-finish craft paints and paintbrushes
- Bottlebrush trees
Directions:
- The houses have holes in the back for lights; reach in with tweezers and remove the windows. Cut parchment to size for new windows, and make “panes” with glue pen and gold glitter. Put dabs of glue on corners of windows and insert into houses, glitter-side out.
- Paint houses in desired colors (we used shades of white, pink, red, and turquoise). Mix equal parts craft glue and white craft paint; brush mixture on anywhere you want “snow,” including house bases. Sprinkle with crystal glitter.
- Remove bases from trees and glue them around houses.
Assemble the Wreath

Tips: Start by gathering the embellishments. When gluing them to the wreath, make sure they are all pointing up, not outward. For the wreath on our cover, we added “snow” to some branches: Dab a mix of white paint and craft glue on branches with a paintbrush and sprinkle the glue with coarse crystal glitter. Let dry, then shake off excess.
Materials:
- Artificial evergreen wreath with lights
- Bottlebrush trees
- Hot-glue gun
- Putz houses (we used 9)
- Cotton balls and surgical cotton
- Spray bottle filled with diluted craft glue (1 teaspoon glue in 1/2 cup water)
- Coarse crystal glitter
- Craft glue
- Red and green reindeer moss
- HO-scale hobby figurines, such as deer and skiers
Directions:
- If necessary, remove any decorations from wreath (ours had pinecones). Secure trees to wreath with hot glue, beginning with a cluster at top, then spacing others all around wreath. Next, hot-glue houses around wreath, inserting a bulb into back of each.
- With your fingers, tease out cotton balls and pieces of surgical cotton to use as small and large snowdrifts. Spray with diluted glue, then sprinkle with glitter; let dry. Hot-glue cotton pieces to wreath at bases of houses, as desired, for a realistic look.
- Use craft glue to attach other decorations, such as dyed reindeer moss and animal and skier figurines.

This craft comes from the December 2014 Issue of Martha Stewart Living.


